How to Add Users To Your Organization
Starting March 15, Platform notifications will only be sent to contacts listed in the Contacts Management section. Please take a moment to ensure this section is up to date. Additionally, Billing information will only be sent to the “Billing Contact(s)” specified in the Contacts Management section, regardless of any previously configured billing emails. Please make sure all the relevant details are aligned.
Overview
The user management page has been redesigned to offer a clearer and more secure experience for managing your Organization's contacts.
-
Unified List: All users now appear in a single paginated list (10, 20, or 50 items per page), replacing the previous separate tabs for Admins, Editors, and Viewers.
-
Contact Identifier: User cards feature a visual label ("Assigned as a contact") if the user is designated to receive specific notifications.
-
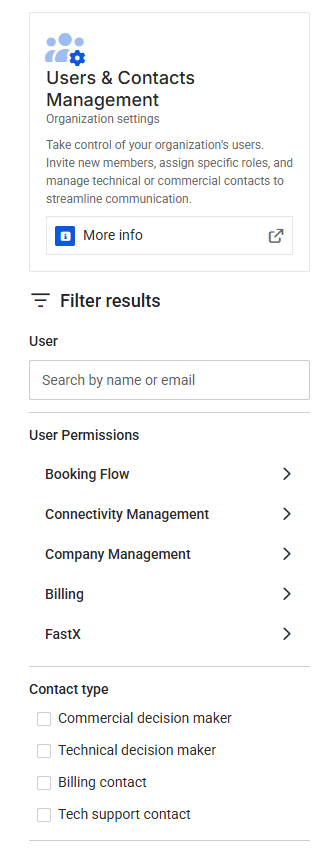
Search & Filters:
- User Search: Search quickly by name or email.
- User permissions: Filter by service access (Booking Flow, Connectivity Management, Company Management, FastX, and Billing).
- Contact type: Filter by assigned notification profiles (Commercial, Technical, Billing, or Tech Support).
How to Add Users to Your Organization
To invite new members, you must have Admin or Owner permissions specifically in the Company Management service.
Follow these steps to invite new users to your Organization:
-
Log in to the Travelgate Platform.
-
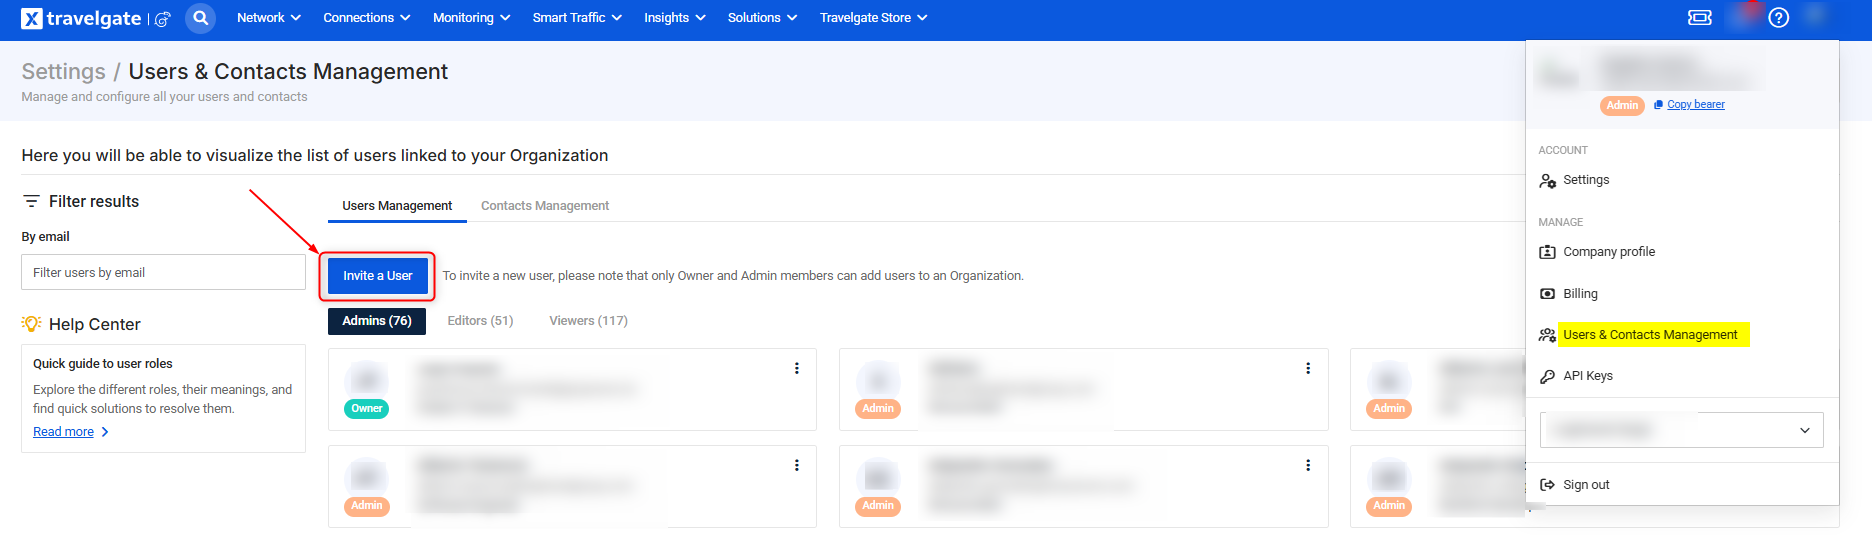
Click on the “Users & Contacts Management” section under your user data, located on the right side of the screen.
-
There, you will see two tabs: Users Management and Contacts Management.
-
Navigate to Users Management. Here, you’ll see a list of users already linked to your Organization.
-
Click Invite a User.
-
Complete the sign-up process:
-
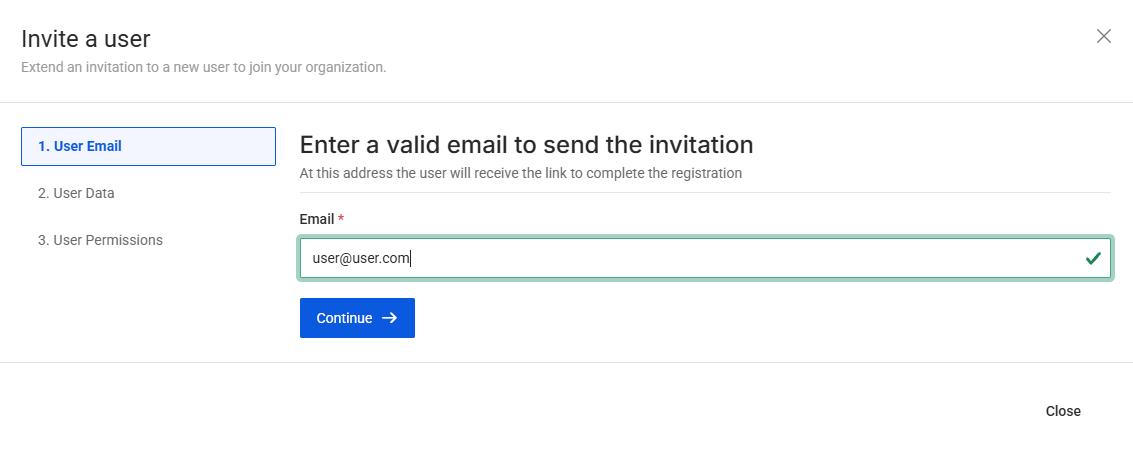
Step 1: User Email
Enter a valid email address. Note that emails cannot be updated once created. If a mistake is made, you must delete the incorrect user and create a new user account.
-
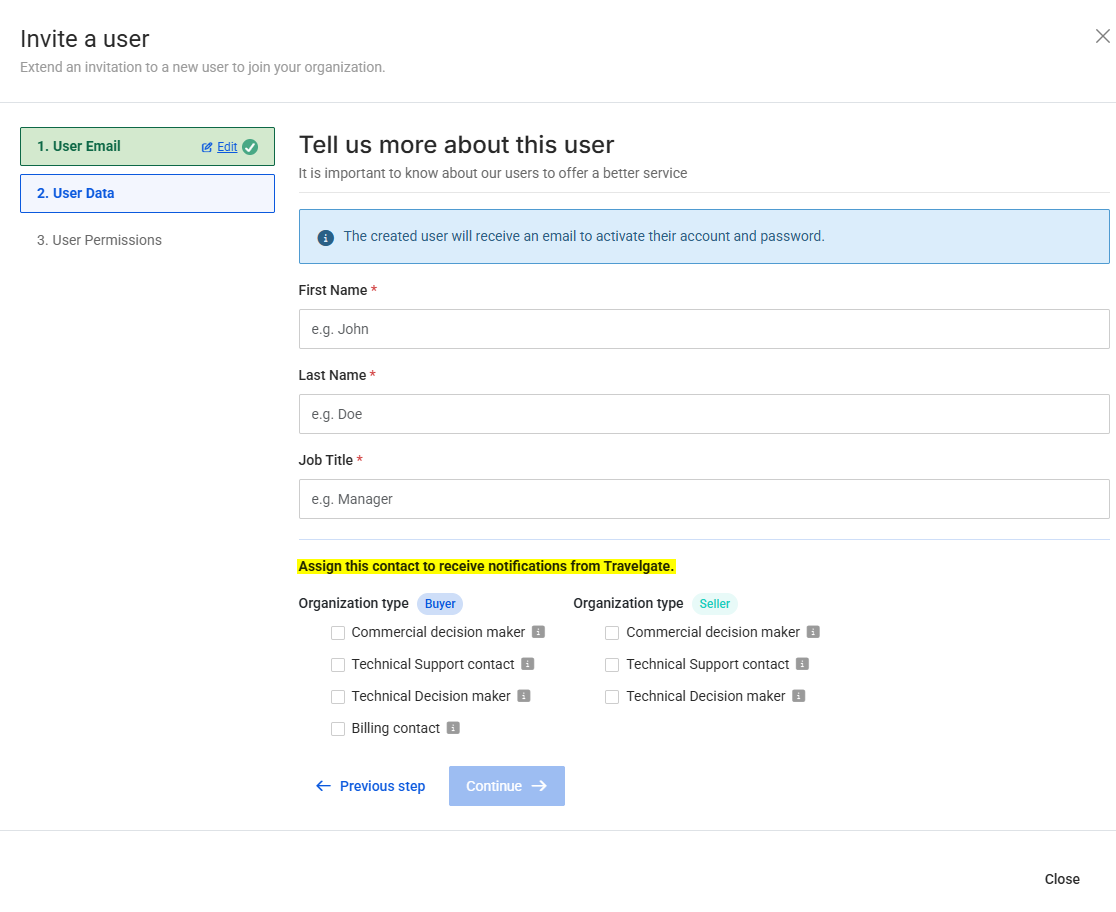
Step 2: User Data
First Name, Last Name, and Job Title are mandatory. If the system detects that the user already exists in Travelgate, a warning banner will appear indicating you can add them to your Organization by specifying their job title and name, and last name will be automatically pre-filled.How to Assign a Contact User to Receive Notifications from Travelgate
- Notification Assignment: You can assign this contact to receive notifications from Travelgate (Buyer or Seller) by checking:
- Commercial decision maker
- Technical Support contact
- Technical Decision maker
- Billing contact.
Contacts ManagementYou can also designate users to receive Travelgate notifications via the Contacts Management tab in the Users & Contacts section.
- Notification Assignment: You can assign this contact to receive notifications from Travelgate (Buyer or Seller) by checking:
-
Step 3: User Permissions
Previously known as "Role", user permissions allow you to select the desired permission level for each service. A warning banner will remind you that each selection determines access to sensitive data.- Dropdown Configuration: For each service (Booking Flow, Connectivity, Company Management, FastX), you must select the desired permission level.
- Dynamic Descriptions: Upon selecting a permission (Admin, Editor, or Viewer), the description under the service name will dynamically update to explain exactly what that user can do.
- Important: Billing permissions include a security toggle. If turned OFF, the Billing dropdown is disabled and is no longer mandatory to complete the creation.

-
-
The new user will receive an email with instructions to either set a password or link their Google account for future logins. Once completed, they will be able to access and explore the Travelgate platform.
Permissions by Service
| Service | Admin | Editor | Viewer |
|---|---|---|---|
| Booking Flow | Full administrative access to the booking flow: - Search, quote, and view booking details. - Create, cancel, and modify bookings. | Full administrative access to the booking flow: - Search, quote, and view booking details. - Create, cancel, and modify bookings. | Read-only access to the booking flow. - Search, quote, and view booking details. |
| Connectivity Management | Full control over connectivity and access settings. - View connection details and access credentials. - Modify existing connections and configurations. - Create new connections. - Create new clients settings (Buyer view). | Operational control over existing connections. - View connection details and access credentials. - Modify existing connections and configurations. | Read-only access to connectivity settings. - View connection details and access credentials. |
| Company Management | Full administrative control over the organization. - View user list and company information. - Invite, manage, and delete users (including 2FA resets). - Manage contacts and edit the company’s public profile. | Operational management of users and profile. - View user list and company information. - Update user details (Job title, Department) and 2FA resets. - Edit the company’s public profile. | Read-only access to organization details. - View user list and company information. |
| Billing | Full control over financial and billing settings. - View invoices and billing information. - Accept or modify connection rates (Commercial Agreement 2023). - Manage billing contact emails. | Full control over financial and billing settings. - View invoices and billing information. - Accept or modify connection rates (Commercial Agreement 2023). - Manage billing contact emails. | Read-only access to billing data. - View invoices and billing information. |
| FastX | Full control over the FastX codes mapping. - View FastX codes and mapping correlations. - Validate and invalidate hotel and board codes. | Full control over the FastX codes mapping. - View FastX codes and mapping correlations. - Validate and invalidate hotel and board codes. | Read-only access to mapping data. - View FastX codes and mapping correlations. |
Can I reactivate users in my Organization?
Yes, you can reactivate users if you have an Owner or Admin permission. To do so, follow the same steps used to add a new user: Navigate to the User Management screen, click "Invite a User," and complete the process.
If you don’t have the required permissions, please reach out to someone in your Organization who does, so they can reactivate the user for you.